
How to Add Your Business to Google: Step-by-Step Guide for 2026
Learn how to add your business to Google for free, set up your Google Business Profile, and start showing up in local search results in 2026.
Kasthuri| 07 July 2026
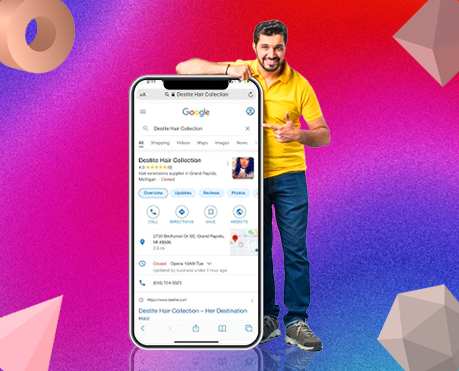
If your business isn’t showing up on Google Search or Google Maps, you’re invisible to customers who are actively looking for what you sell — right now, in your area. The fix is free, takes less than 30 minutes to set up, and can make a measurable difference to how many people walk through your door.
This guide walks you through exactly how to add your business to Google, verify your listing, and set it up properly so it actually shows up when potential customers search for you.
What Is a Google Business Profile?
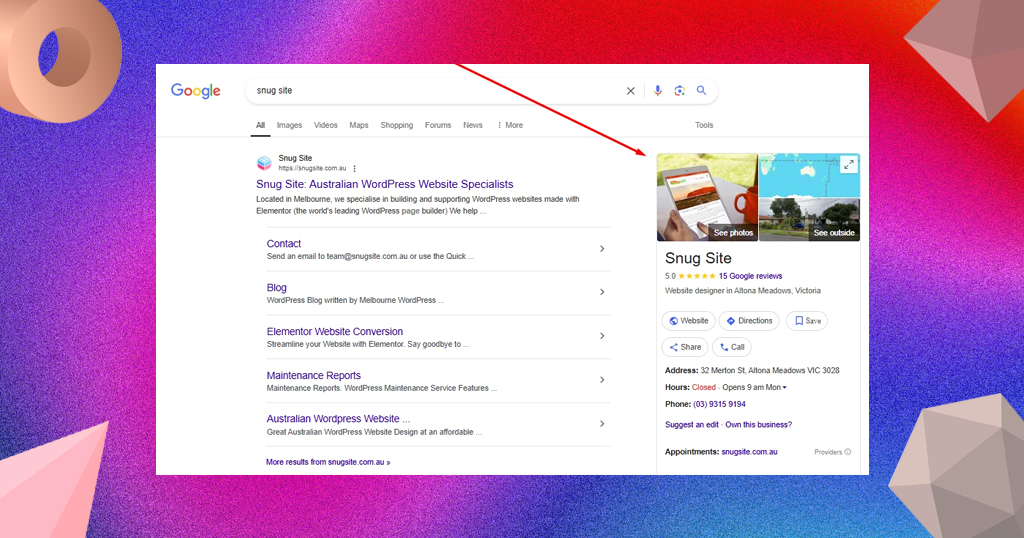
A Google Business Profile (formerly called Google My Business) is your free listing on Google that shows your business name, address, phone number, hours, photos, and customer reviews — directly in search results and on Google Maps.
When someone searches “restaurants near me” or “retail stores in [your city],” the map results with star ratings that appear at the top of the page are Google Business Profiles. Getting listed there is one of the highest-value things a local business can do for free. According to BrightLocal’s Local Consumer Review Survey, the vast majority of consumers use Google to evaluate local businesses before visiting — making your profile one of the first impressions you make.
Step 1: Go to Google Business Profile
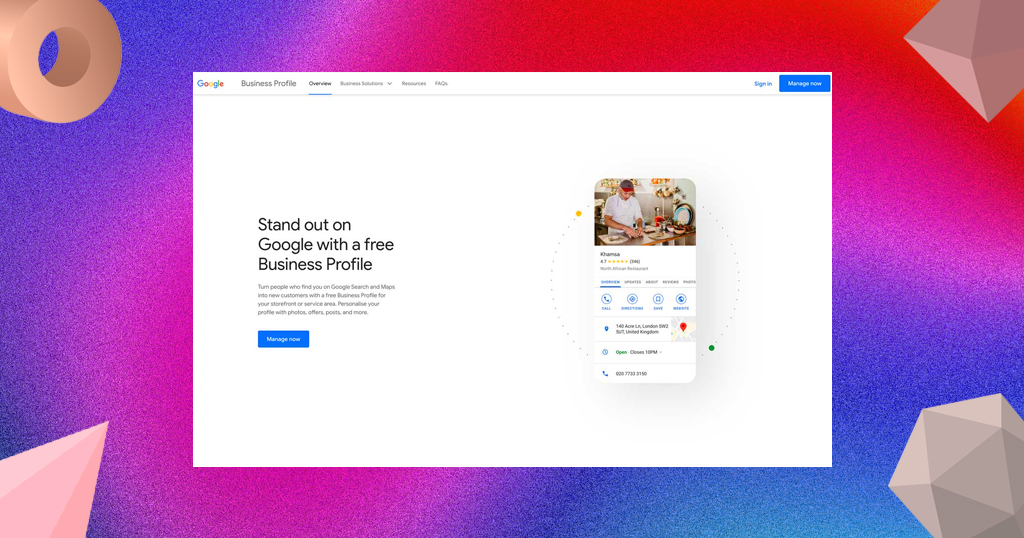
Open a browser and go to google.com/business. Sign in with the Google account you want to use to manage your business listing — ideally a business email address rather than a personal Gmail, so multiple team members can access it if needed.
If you already manage other Google products (Google Ads, Search Console, etc.) from a specific account, use the same one here to keep everything in one place.
Step 2: Search for Your Business Name
Once you’re signed in, Google will prompt you to enter your business name. Type it in exactly as you’d like it to appear publicly.
Two things might happen here:
- Your business already exists on Google — this happens more often than people expect, since Google sometimes auto-creates listings based on publicly available data. If you see your business in the suggestions, click it and follow the steps to “claim” it rather than creating a duplicate.
- Your business doesn’t appear — select “Create a business with this name” and continue to the next steps.
Claiming an existing listing is almost always the better move than creating a new one, since the existing version may already have reviews and map location data attached to it. If you’re unsure how to find or manage reviews already on your profile, read our guide on managing your Google reviews for a full walkthrough.
Step 3: Choose Your Business Category
Google will ask you to select a primary category for your business. This is more important than it looks — it directly influences which searches your profile appears in. Be as specific as possible rather than choosing a broad category.
Examples:
- Instead of “Restaurant,” choose “South Indian Restaurant” or “Cafe”
- Instead of “Retail Store,” choose “Clothing Store” or “Electronics Store”
- Instead of “Health,” choose “Skin Care Clinic” or “Pharmacy”
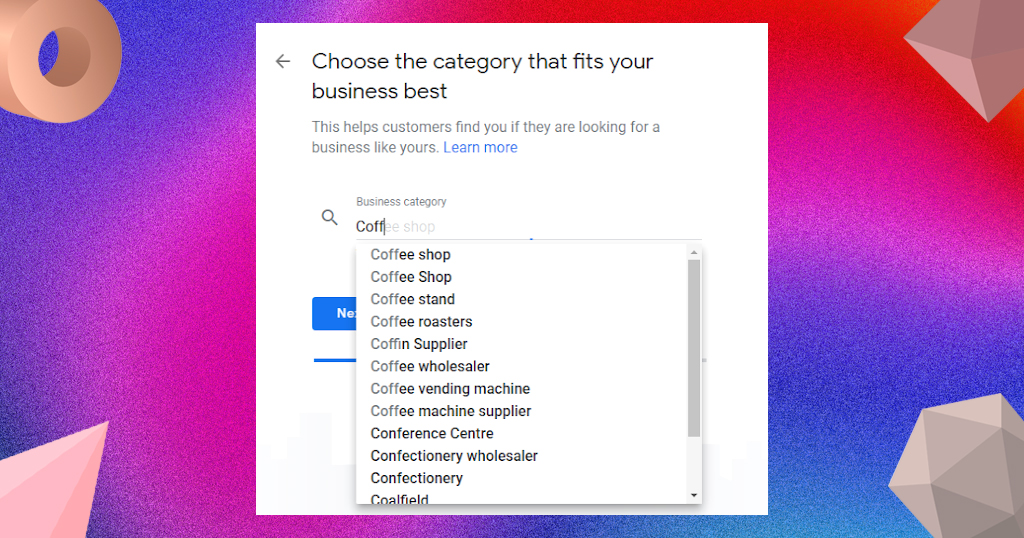
You can add secondary categories later, but your primary category is the most influential signal for local search ranking, so pick the most accurate one first. Google maintains an official list of supported Business Profile categories if you’re unsure which fits your business best.
Step 4: Add Your Location (If You Have a Physical Store)
If customers visit you in person — a restaurant, a retail store, a clinic — choose “Yes” when asked if you want to add a location. Enter your full address carefully, including floor number or unit if applicable.
If you only serve customers at their location (a delivery service, a home repair business, a mobile salon), choose “No” and instead specify the service areas you cover. Google shows both types of businesses in local results, but the setup differs slightly.
After entering your address, Google will show it on a map to confirm placement. Drag the pin to your exact location if it lands slightly off — this matters for customers navigating with Maps. If your pin keeps defaulting to the wrong spot, Google’s help guide on fixing your business location walks you through the correction process.
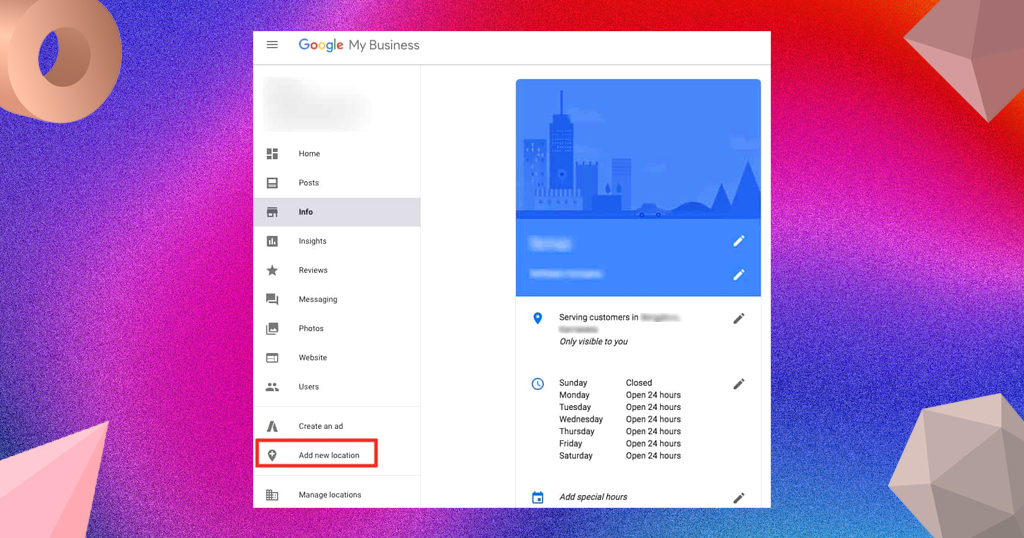
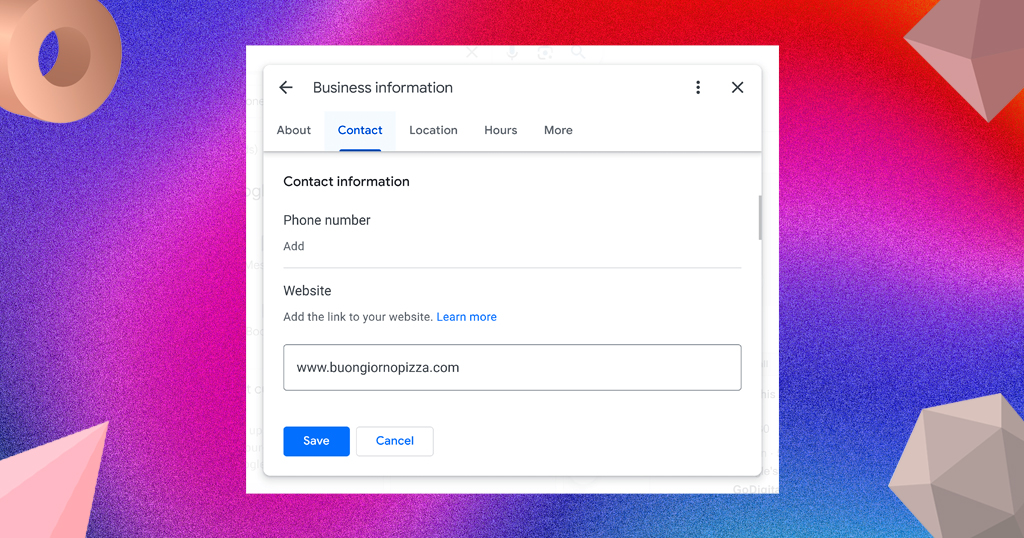
Step 5: Add Your Phone Number and Website
These are the two most common ways customers contact you after finding your listing, so fill both in accurately. Use the phone number you check most reliably during business hours, not a secondary line that goes unanswered.
If you don’t have a website yet, Google will offer to create a basic one for you from your profile information — it’s not a replacement for a real website, but it’s better than a blank field.
Step 6: Verify Your Business
This is the step most people get stuck on, and it’s also the most important — Google won’t display your listing publicly until your ownership is verified.
Verification options Google typically offers:
- Phone or SMS — fastest option, available for most businesses. Google sends a code to your registered number and you enter it to verify instantly.
- Email — similar to phone verification but sent to your registered email address.
- Postcard by mail — Google mails a postcard with a verification code to your business address. This takes 5–14 days. Don’t change your address before the postcard arrives or you’ll need to restart.
- Video call or recording — Google may ask you to verify by showing your storefront, signage, and equipment via live video or recorded upload.
- Instant verification — available if you’ve already verified your website with Google Search Console using the same account.
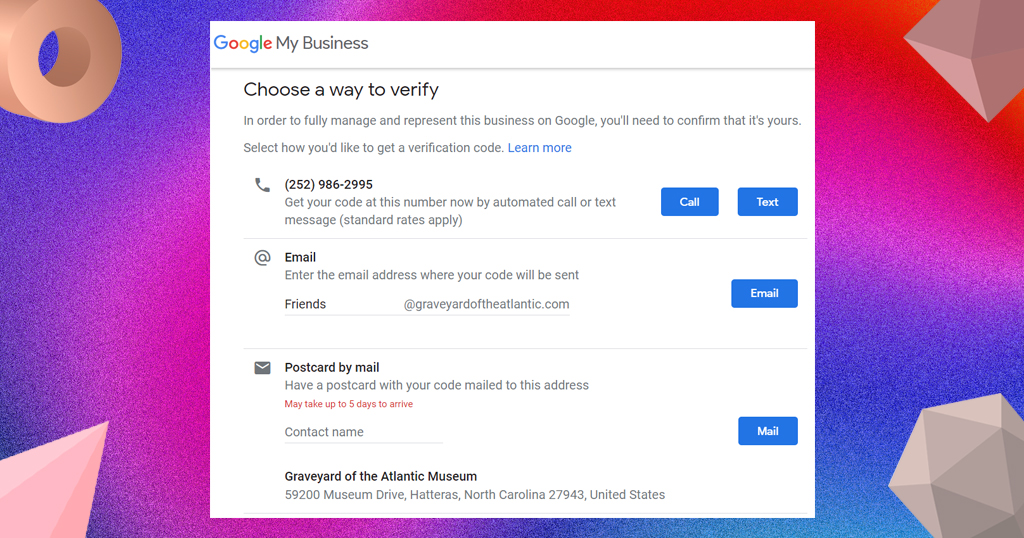
For most Indian small businesses with a physical storefront, phone/SMS verification is typically the fastest available option. For a full breakdown of every verification method, refer to Google’s official Business Profile verification guide.
Step 7: Complete Your Profile Properly
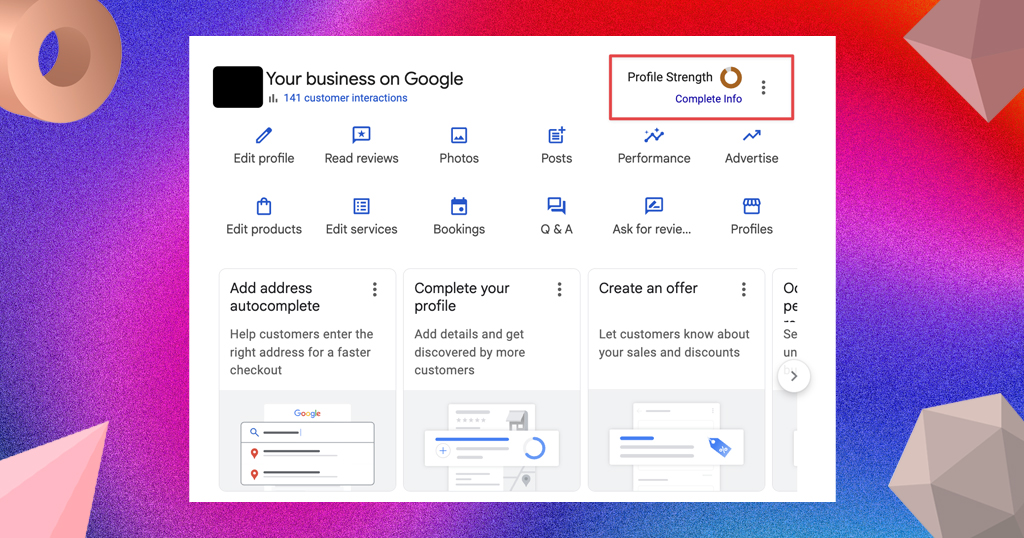
Verification gets you listed — but a complete, detailed profile is what actually helps you rank and convert visitors into customers. Once you’re in, fill in everything:
Business hours: Set your regular hours and mark public holidays separately. Outdated hours are one of the most common reasons customers arrive to find you closed — and leave a bad review about it. Read our guide on how to get more Google reviews to understand how hours accuracy directly affects your ratings.
Photos: Add at least 5–10 good photos — your exterior (so people can find you), your interior, your products or food, and your team if applicable. According to Google’s own data on Business Profiles, listings with photos receive significantly more direction requests and website visits than those without.
Business description: Write 2–3 sentences describing what you do, who you serve, and what makes you different. Include your city or area name naturally — this helps with local search relevance. Keep it factual rather than promotional.
Services or menu: Add your specific services or products. This populates the “Services” section of your profile and feeds into more specific search queries like “Italian food near me” or “hair colour service near me.”
Q&A section: You can proactively post and answer your own questions in this section. Think about what customers most frequently ask — parking, payment methods, home delivery, appointment availability — and answer them here before they have to ask. Google has a dedicated guide to managing Q&A on your profile if you need help getting started.
Step 8: Keep It Active After Setup
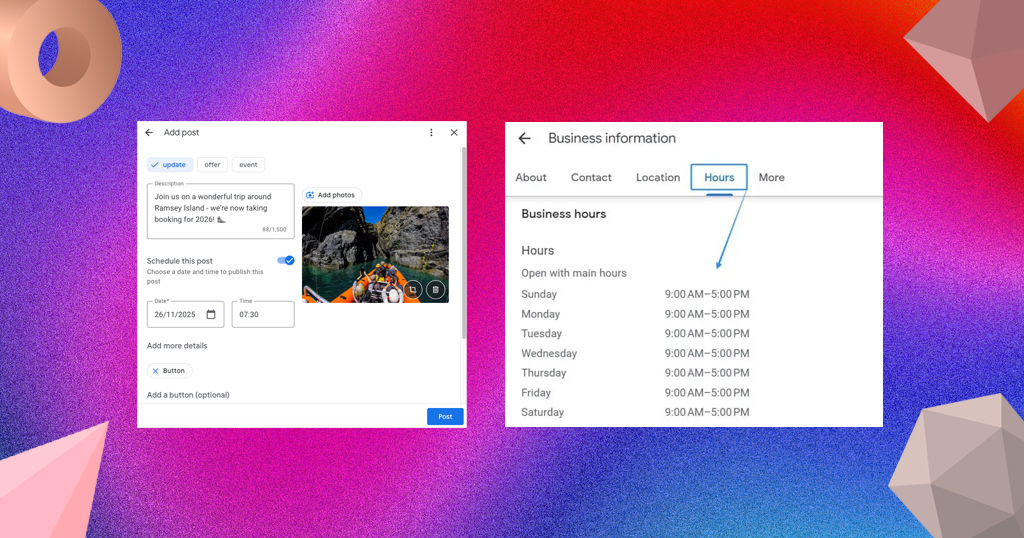
A Google Business Profile isn’t a one-time setup — Google’s algorithm treats activity as a trust signal. The most effective ongoing habits:
- Post updates at least once or twice a month — announcements, new products, offers, or events. These show up in your profile and keep it from looking stale. If you’re managing social content alongside your Google posts, our social media management tool helps schedule both from one place.
- Reply to every review, especially negative ones. A profile with unanswered complaints looks unmanaged regardless of how good your star rating is. If you’re not sure what to write, our Google review response examples guide has 28+ copy-paste templates ready to use.
- Update hours for public holidays before they happen, not after customers arrive to find you closed. Google allows you to set special hours for holidays directly in your Business Profile.
- Add new photos regularly — quarterly at minimum, more often if your menu or products change.
If you’re managing more than one location, keeping each profile updated individually gets time-consuming fast. A centralized Google Business Profile management tool lets you update listings, monitor reviews, and post content across all locations from one place instead of logging in and out of separate profiles.
Common Mistakes to Avoid When Setting Up Your Google Business Profile
- Creating a duplicate listing instead of claiming an existing one — this splits your reviews and confuses Google’s algorithm. Use Google’s duplicate listing removal guide if you find more than one profile for your business.
- Using a keyword-stuffed business name like “Best Biryani Restaurant Hyderabad [Your Name]” — Google’s name guidelines explicitly prohibit this and can result in listing suspension.
- Choosing a broad category instead of the most specific, accurate one.
- Leaving the description blank — a missed opportunity to include your city name and core offering naturally.
- Not verifying — an unverified profile won’t appear publicly no matter how complete it is. If verification is taking too long, check Google’s verification troubleshooting page for fixes.
The Bottom Line
Adding your business to Google is one of the most impactful free marketing steps any restaurant or retail store can take in 2026. It takes less than an hour to set up properly, and it starts working for you around the clock from the moment your listing goes live.
Once you’re listed, the next steps are collecting reviews, responding to them consistently, and keeping your profile updated — all of which Storefries is built to help you manage across one location or many. Check out our pricing plans or browse more practical guides on the Storefries blog.
Quick FAQ: Adding Your Business to Google
1. Is adding my business to Google free?
Yes, completely. Google Business Profile is free to create and manage. There’s no charge to list your business on Google Search or Maps.
2. How long does it take to show up on Google after I add my business?
Once verified, your listing typically appears within a few hours to a few days. Phone and email verification are fastest; postcard verification can take up to 14 days before your listing goes live.
3. Can I add my business to Google without a physical address?
Yes, service-area businesses (home services, delivery, freelancers) can list without a public address and instead specify the areas they serve.
4. What if my business is already on Google but I didn’t add it?
You can claim an existing listing by searching your business name at business.google.com, selecting the listing, and completing the verification process as the owner.
5. How do I get my business to rank higher on Google Maps?
Three main factors: how complete and accurate your profile is, how many recent Google reviews you have, and how close your business is to the person searching. Start with a complete profile, then actively collect reviews from happy customers using a direct review link. Our full guide on how to get more Google reviews walks through the exact steps.
6. How do I manage my Google Business Profile across multiple locations?
Each location needs its own profile, and managing them separately can get overwhelming. A multi-location reputation and listing management tool lets you update all profiles, monitor reviews, and post content from one centralized dashboard.


Leave A Comment